
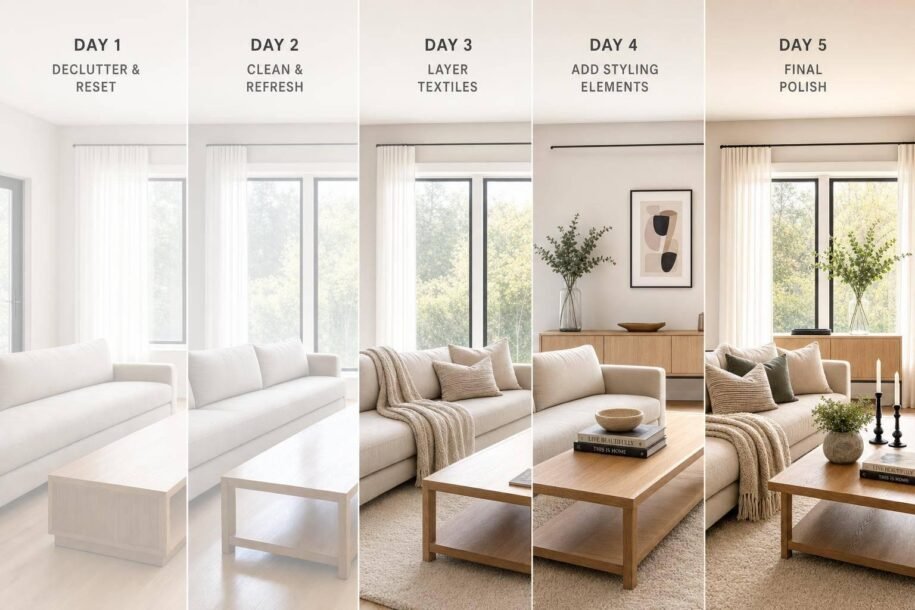
Your photos can make or break your listing in seconds. If I want better Airbnb photos, I don’t wait until the night before. I use a simple 5-day plan: clean first, swap linens, restock supplies, cut visual clutter, then do a final walk-through before the shoot.
Here’s the whole article in one quick view:
- Day 5: Deep clean, declutter, hide cords, and make a room-by-room shot list
- Day 4: Replace worn bedding and towels with light, wrinkle-free sets
- Day 3: Restock guest basics and set up the kitchen and dining area
- Day 2: Remove extra decor, fix bulbs, and stage patios, balconies, or pool areas
- Day 1: Do a last sweep for smudges, chargers, trash cans, lighting, and curb appeal
A few numbers show why this matters:
- 94% of travelers choose a place based on photos
- Guests form a first impression in about 2.7 seconds
- Listings with pro photography can earn 40% more revenue
If I’m local and have time, I can do this myself. If I’m remote, have a high-end rental, or want help with staging, photos, cleaning, and listing setup, a local manager can handle the last steps for me. Just be sure to ask the right questions before hiring a management partner.
This plan is simple: spread the work across five days so the home looks clean, calm, and ready for the camera.
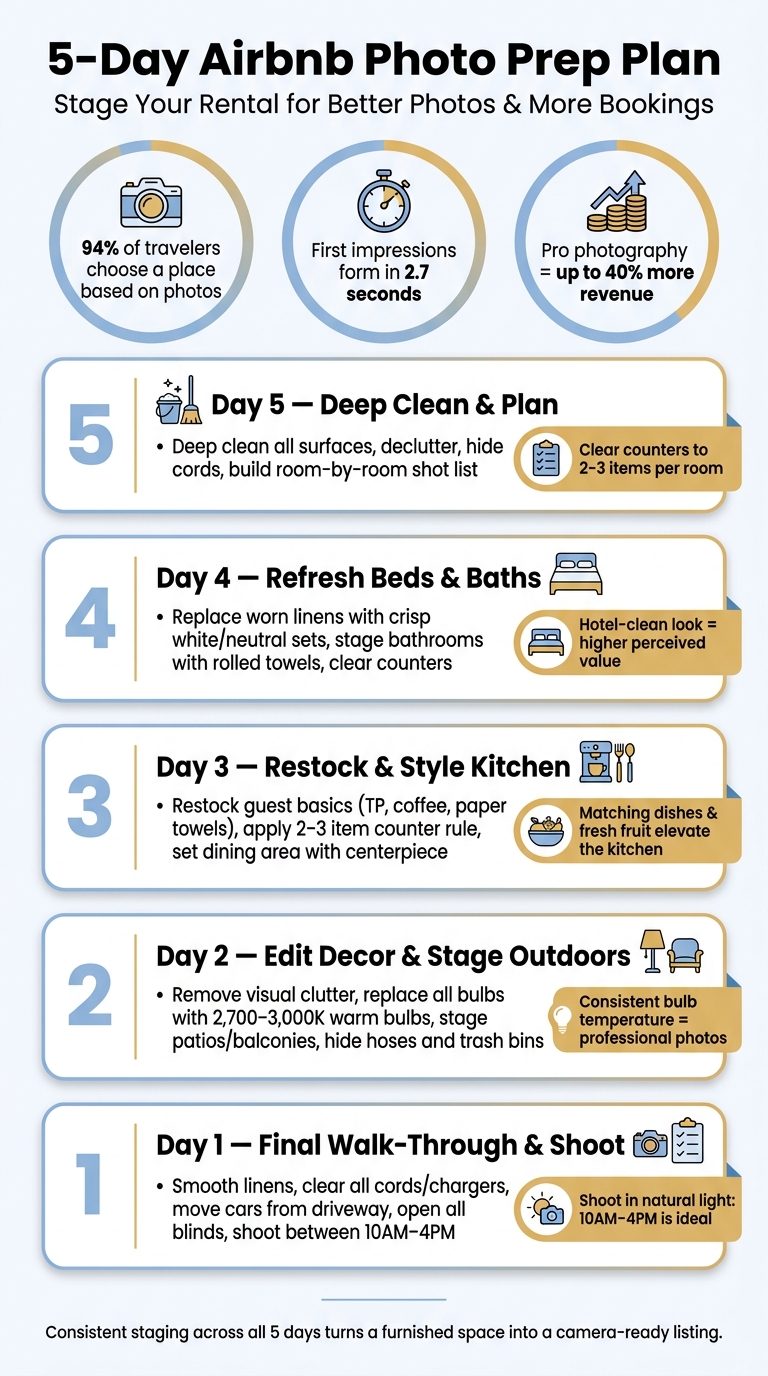
5-Day Airbnb Photo Prep Plan: Stage Your Rental for Maximum Bookings
Airbnb Staging Secrets: Photograph & Style Your Property for Maximum Bookings
sbb-itb-103bddb
Day 5 and Day 4: Clean First, Then Refresh Beds and Baths
Days 5 and 4 set the clean base. In listing photos, a streaked mirror, a packed countertop, or wrinkled bedding can turn people off fast. The good news? All of that is fixable, as long as you deal with it before the photographer arrives.
Day 5: Deep Clean, Declutter, and Build a Room-by-Room Shot List
Start with what the camera will notice first. Wipe baseboards, light switches, appliance fronts, and other visible surfaces until they look clean and bright. Polish mirrors and glass until there are no streaks.
Then clear the clutter and tuck cords out of sight. Put together a shot list for the exterior, shared spaces, bedrooms, bathrooms, and outdoor areas. For each room, note the best angle – the one that makes the space look its best.
| Room | Day 5 Priority Tasks |
|---|---|
| Kitchen | Clear counters to 2–3 items; hide soap, sponges, and cleaning supplies |
| Living Room | Hide remotes; turn off TV; arrange pillows symmetrically |
| Bathroom | Clean mirrors streak-free; hide personal toiletries; put toilet lid down |
| Bedroom | Clear nightstands to lamp + one item; remove personal photos and pet gear |
| General | Tuck all cords; remove papers, cleaning tools, and personal items |
Once the cleaning is done, move to beds and bathrooms.
Day 4: Swap Linens and Towels for a Hotel-Clean Look
Now that the surfaces are clear, make the bedrooms and bathrooms feel hotel-ready.
Replace any linens and towels that look worn or mismatched with crisp, wrinkle-free white or light-neutral sheets and duvets. Make the bed tight. Smooth every wrinkle. Fold the top sheet down neatly. Then add euro shams, accent pillows, and a textured blanket for depth. On camera, layered bedding looks polished and intentional. It signals quality before a guest reads a single word of the listing.
In the bathrooms, bring in fresh white towels and rolled washcloths for a spa-like look. Clear the counters fully. One small plant or a clean soap dispenser is enough. Everything else – toothbrushes, shampoo bottles, and other personal products – should go under the sink or come out of the room. And yes, always put the toilet lid down before any bathroom shot. These details may seem small, but in photos, they separate a bathroom that looks clean from one that looks carefully set up.
Nightstands should stay simple: lamp plus one small object.
Next: restock guest basics and stage the kitchen and dining areas.
Day 3 and Day 2: Restock Supplies, Stage the Kitchen, and Edit Decor
With the beds made and bathrooms set, Days 3 and 2 move from cleaning into styling. This is the stretch where a home starts to feel guest-ready, not just furnished.
Day 3: Restock Guest Basics and Set Up the Kitchen and Dining Area
Start with the basics guests notice right away: toilet paper, paper towels, trash bags, coffee supplies, cooking oil, salt, and pepper. Keep backup items like dish soap and cleaning supplies tucked away so the space looks neat, not overloaded.
In the kitchen, stick to the "2–3 item" rule and keep countertops to no more than three intentional pieces [2]. A coffee maker, fresh fruit, and one cookbook can make the space feel clean and a little upscale. Wipe the stovetop, and leave the sink completely empty. Also check that all visible dishes and cookware match. That small detail makes the room feel pulled together.
"A well-stocked, clean kitchen with matching dishes, real cookware, filtered water, a decent coffee setup, and organized pantry staples generates disproportionate five-star mentions in reviews." – Eric Ravenscroft, The Ravenscroft Group [1]
In the dining area, straighten every chair and bar stool so they line up cleanly. A simple centerpiece, like fresh flowers, adds warmth without making the table feel busy. If you want to push the look a bit more, set the table with matching dinnerware so the whole kitchen and dining space feels connected.
Once the main rooms look clean, shift to visual edits and the outside areas.
Day 2: Edit Decor, Fix Lighting, and Stage Outdoor Furniture
After the basic supplies are in place, start cutting anything that distracts from the photo. Day 2 is about removing visual noise so the property looks open, polished, and photo-ready. Walk through each room and take out personal items and anything that steals attention from the space itself.
Check every bulb, replace any that are burned out, and make sure each light uses warm bulbs in the 2,700–3,000K range [2]. Cool and warm bulbs mixed together can make photos look uneven and amateur.
For outdoor spaces like patios, balconies, pool decks, or other exterior areas, clean the cushions, line up the furniture, and hide anything messy-looking, including garden hoses, trash bins, pool chemicals, and tools. A throw blanket over a chair can add a lived-in touch that helps guests picture themselves there. If the property has string lights or a fire feature, test them and make sure they’re visible in the final setup.
Minimal Decor vs. Styled Decor for Listing Photos
Pick one styling direction and stick with it across the whole property. The best choice depends on the home’s market position and the kind of guest you want to attract.
| Feature | Minimal Decor | Styled Decor |
|---|---|---|
| Visual Impact | Clean, spacious, and professional; emphasizes the "hotel-clean" look | Warm, aspirational, and lived-in; emphasizes the comfortable, lived-in experience |
| Ease of Cleaning | High; fewer items to dust or move during turnovers | Moderate; requires more attention to detail and specific placement |
| Guest Perception | Perceived as modern and efficient; low risk of feeling "dated" | Perceived as high-value and unique; creates memorable photos |
| Clutter Risk | Low; focuses on open surfaces and architectural lines | High; requires careful curation to avoid looking messy in photos |
Neither option is wrong. Minimal decor works well when cleanliness and efficiency matter most. Styled decor fits better when the experience itself is the main selling point. Either way, 94% of guests choose a property based primarily on its photos [2], so the look needs to stay clean and consistent.
Day 1: Final Walk-Through and Photo-Day Setup
Once styling is done, Day 1 is all about the last details that can ruin a photo. This is the point where small issues get caught before they end up in the listing. A wrinkled pillowcase, a smudged mirror, or a phone charger on the nightstand can pull attention away from the room. Think of this as the last cleanup step that turns a staged home into a camera-ready listing.
Room-by-Room Final Checklist Before the Photographer Arrives
Walk through each room like you’re seeing it for the first time as a guest.
- Bedrooms: Smooth the linens, straighten the pillows, and keep nightstands limited to a lamp and one small item.
- Living room: Put away remotes, turn off the TV, and keep the coffee table to two styled items.
- Bathrooms: Clear the counters, close the toilet lid, and remove all visible toiletries. Mirrors need to be streak-free because smudges show up fast in professional photos.
- Kitchen: Empty the sink, hide dish soap and cleaning tools, and keep counters to 2–3 items.
- All rooms: Check for visible cords, shoes, mail, and chargers. These are easy to miss in person and easy to spot in photos.
After the inside is set, shift your attention to access, lighting, and the outside of the home.
Exterior, Thermostat, and Lighting Checks the Morning of the Shoot
Plan the shoot between 10:00 AM and 4:00 PM so you can use the best interior natural light [2]. Before the photographer gets there, move cars out of the driveway, take trash cans out of frame, and sweep the entry. Remove covers from outdoor amenities like grills, fire features, and pool equipment so they can be seen clearly.
Set the thermostat to a comfortable temperature. Turn on every interior light and make sure all bulbs are in the 2,700–3,000K range [2]. Mixed color temperatures can make photos look uneven and unprofessional [2]. Open every curtain and blind to bring in as much natural light as possible.
How a Local Operator Can Handle Final Photo Prep
If you own from a distance, someone local needs to handle these last details in person. Rank One Stays can manage final walk-throughs, professional photography, and QC checks for remote owners and investors who want the home photo-ready without being onsite.
Conclusion: The 5-Day Checklist That Gets a Rental Ready for Listing Photos
If you followed the five-day plan, the home should now look clean, pulled together, and ready for the camera. In just five days, you can clean, restock, stage, and wrap up with a room-by-room check before photo day.
That work matters more than many owners think. Photos shape first impressions almost instantly. 94% of potential guests make booking decisions based primarily on photos [2], and professional photography can lift results by 40% or more [1][2]. Put simply: get the basics right before the shoot.
If you’d rather hand off the last-mile prep, Rank One Stays offers staging and full-service management for owners who want a hands-off setup.
FAQs
Do I need a professional photographer?
Professional photography is one of the best upgrades you can make to a listing. In many cases, it delivers the highest ROI. Properties with professional photos can earn up to 40% more revenue than listings with amateur images.
If you’re trying to keep costs down, DIY photos can still do the job. But there’s a clear gap. A pro knows how to handle lighting, staging, and angles that make a space look its best and help turn views into bookings.
If you want a done-for-you path, Rank One Stays offers vacation rental interior design and staging to help get your property photo-ready.
What if I only have one day to prep?
If you only have one day, focus on the changes that make the biggest difference: open all the curtains, switch on every light, and make the place feel clean, bright, and welcoming. Then get 15 to 20 high-quality photos, ideally in natural light between 10:00 AM and 4:00 PM.
If you want a fast pro fix, Rank One Stays offers vacation rental interior design and staging services to help get your property market-ready.
How do I stage a small Airbnb without making it feel empty?
Focus on a few intentional details that help guests picture themselves staying there. And if the space is small, don’t cram it with extra furniture. That usually makes the room feel tighter, not better.
A little warmth goes a long way. Set the dining table. Drape a throw blanket over the sofa or bed. Leave a coffee cup or cookbook in the kitchen. Add fresh flowers, a small plant, or a few well-chosen books.
These small touches make the space feel lived-in, calm, and inviting without adding clutter.