
Lifestyle photography can transform your vacation rental listing by showcasing not just the property, but the experience it offers. High-quality, well-staged photos help potential guests imagine themselves in the space, leading to more bookings and higher revenue. Here’s what you need to know:
- Why it matters: Listings with professional photos get 40% more clicks and can boost revenue by up to 52%.
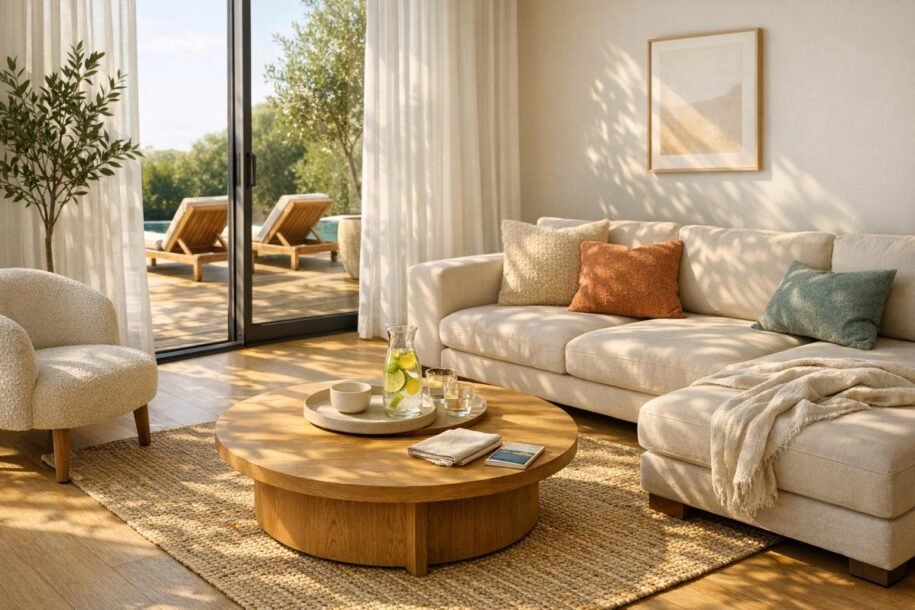
- Preparation tips: Declutter, stage with inviting details (e.g., blankets, coffee mugs), and use natural light for the best results.
- Photography essentials: Use a DSLR or a smartphone with HDR, a wide-angle lens, and a tripod. Capture at chest height for straight lines.
- Editing basics: Tools like Lightroom can enhance brightness, contrast, and composition. Aim for clear, realistic images.
- DIY vs. professional: DIY is cost-effective but time-intensive, while professional vacation rental management delivers polished results that often pay for themselves quickly.
Whether you’re managing a cozy cabin or a modern city apartment, investing in lifestyle photography can make your listing stand out in a competitive market.
Secrets to AMAZING Airbnb Photography: A Step-by-Step Guide

sbb-itb-103bddb
Preparing Your Rental for Lifestyle Photography
Getting your rental guest-ready is crucial – especially since high-resolution photos can highlight even the smallest imperfections.
Decluttering and Staging
Start by depersonalizing the space. Remove family photos, diplomas, and personal items. Tuck away things like charging cables, power strips, cleaning products, pet supplies, and trash cans. Turn off TVs and computer screens to avoid distracting reflections, and angle lampshades toward the wall for a cleaner appearance.
Once the clutter is gone, it’s time to stage. Add thoughtful touches like a cozy blanket draped over the couch, a couple of coffee mugs and a bowl of fruit in the kitchen, and crisp white bedding in the bedroom. As AvantStay explains:
"You aren’t selling the home, you’re selling the guest experience." [1]
Fluff throw pillows and stand bedroom pillows upright for a polished look. Arrange furniture away from walls to create inviting groupings that make rooms feel open and welcoming. If staging feels overwhelming, consider enlisting vacation rental interior design services to elevate your space into a guest-ready experience.
Creating a Consistent Atmosphere
Your rental’s theme should be clear in every photo. For example, a rustic mountain cabin might feature warm wood tones, plaid blankets, and a roaring fireplace. On the other hand, an urban loft benefits from clean lines, modern art, and sleek furniture. Stick to a consistent color palette and use props that align with the overall vibe. Outdoor spaces deserve attention too – arrange patio furniture, light the fire pit if you have one, and remove distractions like pool vacuums, garden hoses, or recycling bins.
Maximizing Natural Light and Ambiance
Natural light is key to creating professional-looking photos. Open all blinds and clean the windows to let in as much light as possible. Sheer curtains can help diffuse harsh sunlight. Photographer Erin Derby recommends:
"To make photos look more professional, turn off the lights inside, and shoot using only daylight." [2]
Artificial lighting, especially overhead lights, can create unwanted shadows or color distortions. If extra light is needed, use floor or table lamps with matching color temperatures, or light the fireplace for added warmth. When shooting, aim your camera at a corner instead of straight-on. This technique adds depth and makes rooms appear larger and more inviting.
With your rental perfectly prepped, you’re ready to move on to capturing stunning photos that showcase the space.
Tips for Taking High-Quality Lifestyle Photos
Once you’ve set up your rental with thoughtful staging and ideal lighting, the next step is capturing photos that truly showcase its lifestyle appeal. The right combination of tools and techniques can elevate your images from basic to eye-catching, helping to attract more bookings.
Photography Equipment You’ll Need
You don’t need a fortune in gear to take great photos. Today’s smartphones, especially those with HDR and high-resolution capabilities, can deliver impressive results [8] [9]. However, for more precision, a DSLR or mirrorless camera paired with a wide-angle lens is a solid choice. A 16–25mm lens works well for full room shots, while a 30–50mm lens is ideal for capturing finer details without distortion [8].
A sturdy tripod is a must-have – it eliminates blur and ensures vertical lines, like walls and windows, stay straight. If your property boasts stunning exteriors, such as mountain views in a Denver vacation rental, aerial shots can add a wow factor. In that case, hiring an FAA Part 107 certified drone operator is worth considering. Costs for professional photographers range from $150 to $500, depending on property size and extras like drone or twilight photography [8].
Key Photography Techniques
Getting the right camera height can make or break your interior shots. Photographer Paige Elizabeth Gribb shares this tip:
"For most interiors, you’ll want to lower your camera down to chest height or even a bit lower… This will make all the vertical lines (doors, walls, windows, etc) look as straight and polished as possible" [2].
Stick to landscape orientation, as it’s the preferred format for platforms like Airbnb and Vrbo [8] [6]. Use HDR mode to balance lighting between bright and dark areas [2] [6]. When framing your shot, aim for a balanced composition: roughly one-third floor, one-third middle space, and one-third ceiling [10]. This creates a natural and visually appealing perspective.
Adding small, relatable details – like a steaming coffee mug or an open book by the fireplace – can help potential guests imagine themselves enjoying the space [1] [2] [6]. These thoughtful touches make your photos feel inviting and personal.
Editing Your Photos for a Professional Look
Once you’ve taken your photos, editing is where the magic happens. Start with an app like Snapseed or Adobe Lightroom Mobile and use the "Auto" function to quickly adjust brightness and contrast [6] [10]. From there, fine-tune specific elements: tweak Highlights to recover overexposed areas and adjust Shadows to bring out hidden details without losing depth [11].
Use tools like "Perspective" or "Lens Correction" to straighten any crooked lines, and ensure the white balance is spot-on so whites don’t appear too yellow or blue [11]. For desktop editing, Adobe Lightroom and Photoshop offer advanced controls, while services like boxbrownie.com are a great option if you’d rather outsource [2].
When exporting, save your images as sRGB JPEGs with a resolution of at least 1,200 x 800 pixels, and keep file sizes under 2MB to ensure quick loading times [7] [10]. High-quality, well-edited photos can make all the difference in capturing attention and driving bookings.
DIY vs Hiring Professionals for Lifestyle Photography
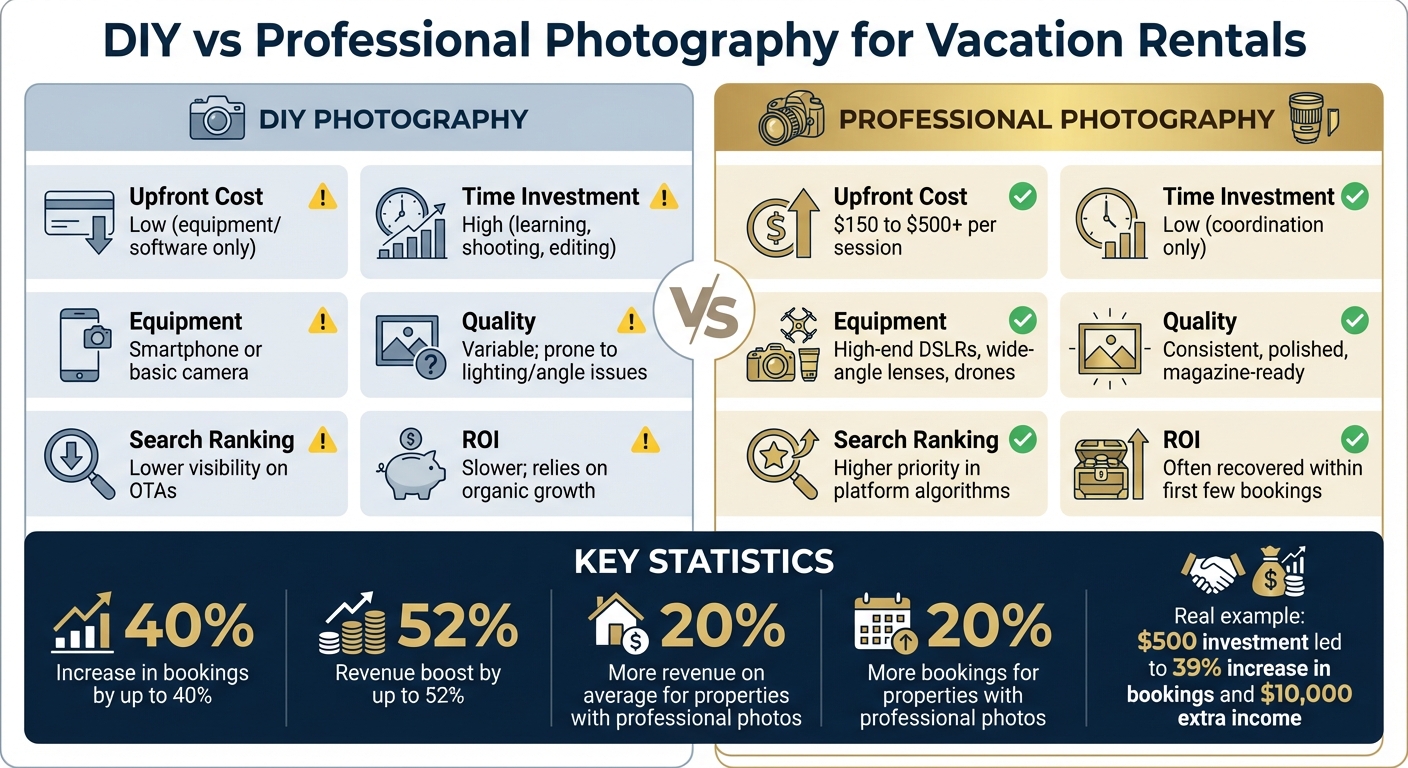
DIY vs Professional Vacation Rental Photography: Cost, Quality and ROI Comparison
Choosing between DIY photography and hiring professionals often comes down to balancing upfront costs with long-term benefits. While both options have their merits, the quality gap between them can make a substantial difference.
Pros and Cons of DIY Photography
DIY photography can be a cost-effective option, giving you complete creative control over your images. You can easily update photos whenever you make changes to your property, like refreshing the décor or adding new amenities. If you already own basic equipment, such as a smartphone or a camera, your main investment will be your time and perhaps a tripod.
However, producing top-notch photos on your own takes more than just snapping pictures. You’ll need to learn technical skills like using natural light effectively, minimizing vertical distortion, and editing images without overdoing it. Even with some practice, DIY photos might lack the professional polish that helps listings stand out on platforms like Airbnb and VRBO. This can affect search visibility and reduce click-through rates, potentially impacting bookings and revenue [3].
These challenges highlight why many property owners turn to professional photographers.
Benefits of Hiring Professionals
Professional photographers come equipped with tools and expertise that are hard to match on your own. They use high-end DSLRs, wide-angle lenses, drones for aerial shots, and advanced editing software to create visually stunning images. Their experience allows them to showcase a property’s best features – like pools, outdoor spaces, or unique architecture – while capturing the overall "flow" of the space [1]. Listings with professional photos often see a significant boost in visibility, bookings, and revenue. In fact, professional images can increase bookings and revenue by up to 40% [8].
The financial payoff is clear. For example, in April 2024, a vacation rental owner who spent $500 on professional photography experienced a 39% increase in bookings, leading to an extra $10,000 in income [12]. On average, properties with professional photos earn 20% more revenue and get 20% more bookings compared to those with DIY images [3].
| Feature | DIY Photography | Professional Photography |
|---|---|---|
| Upfront Cost | Low (equipment/software only) | $150 to $500+ per session [8] |
| Time Investment | High (learning, shooting, editing) | Low (coordination only) |
| Equipment | Smartphone or basic camera | High-end DSLRs, wide-angle lenses, drones |
| Quality | Variable; prone to lighting/angle issues | Consistent, polished, magazine-ready |
| Search Ranking | Lower visibility on OTAs | Higher priority in platform algorithms [3] |
| ROI | Slower; relies on organic growth | Often recovered within the first few bookings |
For property owners looking to maximize their listing’s appeal and performance, professional photography is often worth the investment. Services like Rank One Stays simplify this process by offering professional photography and staging as part of their full-service listing optimization. This is especially helpful for those managing multiple properties or living far from their rental. Whether you’re managing a Scottsdale vacation rental or a mountain escape in Denver, professional images can justify higher nightly rates and build trust with guests from the moment they view your listing.
Using Lifestyle Photos to Optimize Airbnb and VRBO Listings
Once you’ve staged and taken eye-catching photos, the next step is showcasing them effectively to boost bookings. Organized and thoughtfully presented images can turn casual browsers into paying guests. Did you know that 60% of listing views begin with a guest clicking on a photo? Even more telling, 40% of the time when a guest decides not to book, the last thing they interacted with was an image [13]. Clearly, a smart photo strategy can directly impact your bookings and revenue.
Choosing and Organizing Photos for Listings
Start with the First-Five Rule: the first five photos are crucial. These should include a hero shot, the main living area, a standout amenity, the primary bedroom, and the best view. These images set the tone and create a strong first impression [6][7].
From there, arrange your photos to mimic the natural flow of a property walkthrough. Begin with the entrance, move through common areas, private rooms, and finish with outdoor spaces. This order helps guests visualize the layout and imagine themselves staying there [5][6].
When photographing each room, apply the Four Passes Technique: capture a corner angle, a straight-on shot, a close-up detail, and a transition view. This mix of wide-angle shots and detailed close-ups highlights both the space and its unique character [6].
Keep technical specs in mind. Photos should be at least 1,200 x 800 pixels, with Airbnb recommending 1,024 x 683 as optimal. File sizes should stay under 2MB to ensure fast loading. Always use horizontal orientation to avoid cropping issues on platforms like Airbnb and VRBO [5][6][7][10]. Whether you’re managing a Denver vacation rental or a Lighthouse Point waterfront property, maintaining these standards across all listings ensures consistent quality.
Once your photo gallery is organized, enhance it further with detailed captions and virtual tours.
Adding Virtual Tours and Captions
Captions are your chance to share details that photos alone can’t convey. Instead of generic phrases like "cozy living room", aim for specifics: "Oversized sectional sofa seating 8 with a gas fireplace" or "200 Mbps fiber internet – ideal for remote work" [14]. Use captions to clarify the layout (e.g., "Bedroom 1 is on the second floor with an en-suite bathroom"), highlight capacity ("The dining table extends to seat 10"), and point out features like walk-in showers or stair-free access [10][14].
"Your listing description isn’t just information – it’s your pitch. Combined with professional property photography, it converts browsers into bookers."
– Triad Vacation Rentals [14]
Since 78% of Airbnb guests read the full listing description before booking [14], make your captions count. Focus on the most important details in the first few sentences, and address common concerns like parking, workspace setup, or kitchen amenities. This not only reassures potential guests but also helps avoid negative reviews later.
For properties with complex layouts, consider adding virtual tours using tools like Matterport or Airbnb’s "Photo Tour" feature. These tools automatically organize images by room, but double-check the order to ensure it follows a logical path [10].
If managing all these details feels overwhelming, companies like Rank One Stays offer full-service solutions. From professional photography to optimized captions, they handle everything to maximize your property’s visibility and bookings. With these strategies in place, you’ll have a listing that not only grabs attention but also turns interest into reservations.
Conclusion
Great lifestyle photography isn’t just about aesthetics – it directly impacts your bottom line. Listings with professional photos can increase revenue by up to 52% and attract 40% more clicks [4]. And remember, potential guests form their first impression in just 50 milliseconds [15].
Investing in professional photography, which typically costs around $400, pays for itself quickly – often within just two bookings [15]. Whether you’re showcasing a Denver mountain retreat or a Scottsdale desert escape, applying key techniques like staging, using optimal lighting, and following the First-Five Rule can make your listing stand out.
If you’re planning to handle the photography yourself, focus on the basics: deep cleaning, decluttering, and scheduling your shoot during golden hour for the best natural light. Small details, like a steaming coffee mug or a beautifully set dining table, can create a warm, inviting atmosphere. Keep your camera at chest height to maintain straight vertical lines, and edit lightly to ensure your photos reflect reality.
For those who prefer to leave it to the pros, full-service management is a hassle-free option. Rank One Stays offers expert staging, professional photography, and listing optimization, delivering results that outperform the market average by 38%. With fees starting at just 10% and no long-term contracts, it’s a straightforward way to maximize your rental’s potential.
From preparation to execution, every detail in your photography tells a story – and that story is what turns browsers into bookings. With 83% of travelers spending more time on listings with high-quality photos [4], upgrading your photography is an investment in your rental’s success.
FAQs
What photos should I include first on Airbnb or Vrbo?
When showcasing a property, begin with high-quality, well-lit photos of the main living areas like the living room, kitchen, or master bedroom. These spaces often highlight the property’s standout features. Use natural light whenever possible to create a bright, welcoming atmosphere. Make sure the rooms are decluttered and styled with attractive decor to boost their appeal. Wide-angle shots are particularly useful for emphasizing the layout and giving viewers a sense of the lifestyle the property offers. These details can make a big difference in catching the eye of potential guests.
How do I avoid wide-angle distortion in room shots?
To reduce distortion when using wide-angle lenses, opt for a high-quality lens with a focal length of 16-24mm for full-frame cameras or 10-18mm for crop sensors. Keep your camera level and maintain a height of 3.5 to 5 feet for balanced composition. Avoid using lenses with extreme wide angles (anything wider than 14mm), as they can exaggerate distortion. Position your camera away from corners to prevent unnatural stretching, and rely on editing software to correct vertical lines and maintain realistic proportions.
When should I hire a pro photographer instead of DIY?
When you’re looking to grab attention fast, showcase your property’s standout features, and increase bookings, hiring a professional photographer is a smart move. High-quality photos can make your listing far more appealing, potentially boosting its allure by 20% or more. This small investment often pays off, helping your property generate higher revenue and stand out in a crowded marketplace.